 Save
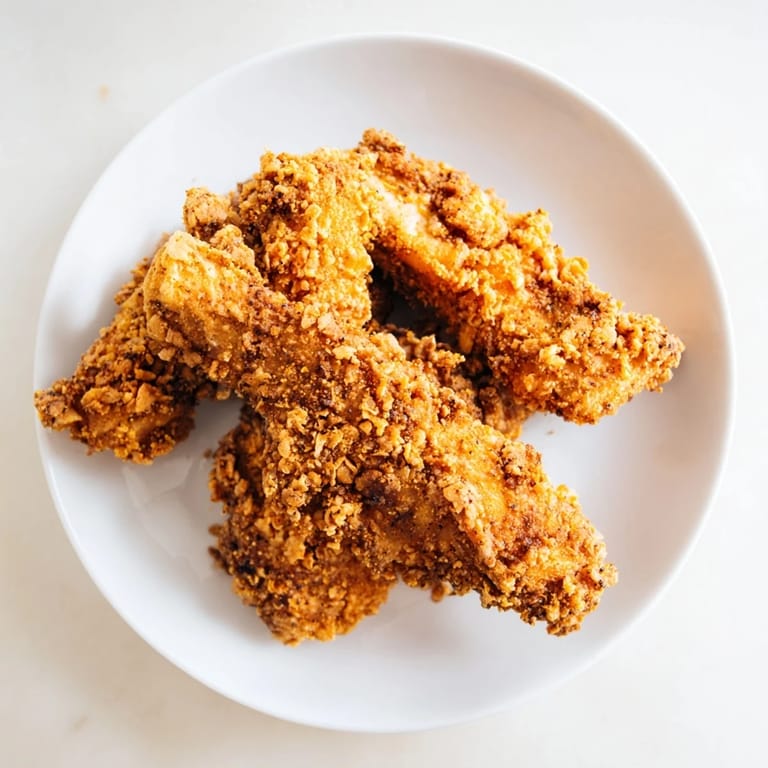
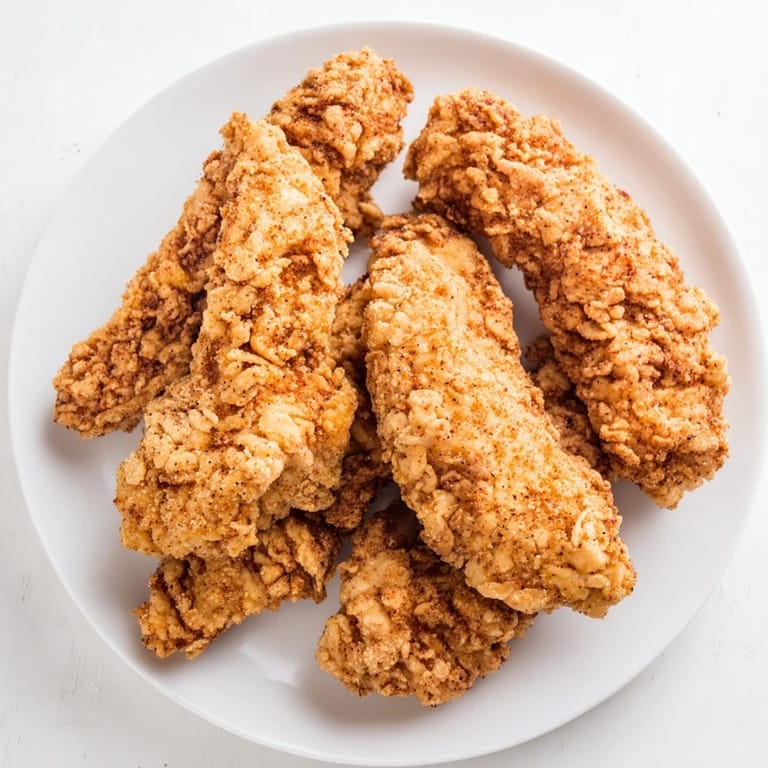
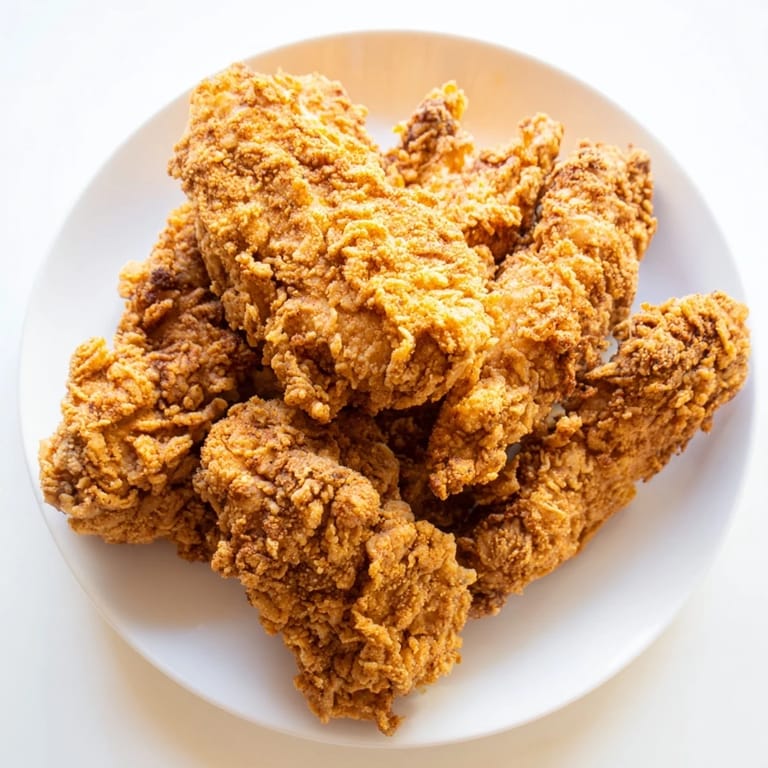
Save There's something about the sizzle of chicken hitting hot oil that instantly transports me back to my grandmother's kitchen on lazy Sunday afternoons. She had this old cast-iron skillet that had seen decades of fried chicken, and she swore the seasoning in the metal itself made all the difference. I've tried to replicate that magic countless times, tweaking buttermilk ratios and flour blends, and finally landed on this version—one that delivers that perfect contrast of golden, crispy exterior and tender, juicy meat that makes everyone at the table pause mid-conversation just to appreciate the bite.
I once made these for a potluck where I was convinced someone else would show up with fried chicken too—talk about kitchen paranoia. But when I pulled my golden batch out of the oil and saw the way people's eyes lit up, I realized this wasn't about competition; it was about delivering exactly what people secretly hoped would be there. That's when I understood these tenders weren't just dinner; they were comfort wrapped in crispy flour.
Ingredients
- Chicken tenders: Buy them pre-trimmed if you can find them; it saves time and they fry more evenly than chicken breasts you've cut yourself.
- Buttermilk: This is non-negotiable for tenderness—the acidity breaks down the proteins gently while adding subtle tang that balances the richness of the fry.
- All-purpose flour: Don't overthink this; standard flour gives you the ideal structure for a shatteringly crisp crust.
- Paprika: Beyond color, it adds a gentle warmth that reminds people why they loved fried chicken in the first place.
- Baking powder: A small amount creates tiny air pockets in the coating that become impossibly crispy when fried—this is the move that changed my game.
- Vegetable oil: Choose a neutral, high-heat oil; peanut or canola work beautifully, but avoid anything with strong flavor that'll compete with the seasoning.
Tired of Takeout? 🥡
Get 10 meals you can make faster than delivery arrives. Seriously.
One email. No spam. Unsubscribe anytime.
Instructions
- Make the marinade and soak the chicken:
- Whisk buttermilk with salt, pepper, garlic powder, and onion powder until the spices are fully dissolved and the mixture smells savory and alive. Coat each tender thoroughly and let them rest in the fridge—overnight is genuinely worth it if you have the time, though an hour does the job.
- Build your flour mixture:
- Combine flour, paprika, salt, pepper, cayenne if you like heat, and baking powder in a shallow dish, stirring until the color is even and you can't see any white streaks of flour hiding underneath.
- Heat the oil to the right temperature:
- This matters more than you'd think—175°C is where magic happens, not so hot that the outside burns before the inside cooks, not so cool that you end up with greasy chicken. A thermometer takes the guesswork out entirely.
- Dredge and fry in batches:
- Pull a tender from the buttermilk, shake off excess, and press it firmly into the flour mixture so every inch gets coated—this creates that shatteringly crisp texture. Fry in batches without crowding; the oil temperature will plummet if you drop too many in at once, and steamed chicken is nobody's dream.
- Monitor for golden perfection:
- Four to five minutes per side, watching for that deep golden-brown color and listening for the sound to shift from aggressive sizzle to a more mellow crackling. Internal temperature should hit 75°C, but honestly, when they look that golden, they're done.
- Rest before serving:
- Two minutes on paper towels lets the exterior stay crisp while the interior settles; skip this and you'll bite into steam.
 Save
Save I remember the moment my young nephew bit into one of these and immediately asked for another without even finishing the first—no ketchup, no sauce, just pure chicken and crust. That silent vote of confidence meant more to me than any compliment could have; it proved that sometimes the simplest foods, done right, are exactly what people need.
The Science of Crispy Coating
The baking powder in the flour mixture does something magical that most people never talk about: it reacts with the moisture from the buttermilk-soaked chicken, creating carbon dioxide bubbles that expand in the heat and leave behind a network of tiny air pockets. This is what gives you that shattering, audible crispness that cheap fried chicken never achieves. The paprika doesn't just color the outside—it adds subtle flavor depth and helps the coating brown more evenly because it absorbs heat slightly differently than plain flour, creating visual interest and preventing pale spots.
Marinating Beyond One Hour
If you have the luxury of overnight marinating, the buttermilk has time to truly penetrate the chicken, making it almost impossible to dry out during frying. I've left chicken soaking for up to 24 hours without any negative effects; the acid doesn't make it mushy as long as you don't go crazy. The flavors also have time to marry—by morning, you've essentially pre-seasoned from the inside out.
Serving and Storage Wisdom
These are best eaten within an hour of frying while the contrast between crispy exterior and juicy interior is at its peak, but they genuinely stay respectable for several hours at room temperature if you're serving a crowd. For storage, let them cool completely before placing in an airtight container in the fridge, where they'll keep for up to three days and can be reheated in a 180°C oven for five minutes to restore crispness.
- Honey mustard and ranch are the classics, but don't sleep on hot sauce mixed with a touch of mayo for something more interesting.
- Serve alongside something cool and crisp like coleslaw or a sharp vinegar-based sauce to cut through the richness.
- Leftover tenders make incredible chicken sandwiches or salad toppers the next day—nothing goes to waste.
 Save
Save Crispy fried chicken tenders might sound like the kind of dish that requires restaurant equipment or secret family recipes passed down through generations, but the truth is simpler: buttermilk, flour, hot oil, and patience. Make these once and you'll understand why they're the default request at my table.
Kitchen Guide
- → How long should the chicken marinate?
Marinate the chicken tenders in buttermilk and spices for at least 1 hour to enhance tenderness and flavor. Overnight marinating yields even better results.
- → Can I make the coating extra crispy?
Yes, double-dip the tenders by coating them in flour, dipping back into buttermilk, and then flour again before frying to achieve an extra crunchy crust.
- → What oil is best for frying chicken tenders?
Use a neutral oil with a high smoke point, such as vegetable or canola oil, to ensure even frying and a crispy finish without burning.
- → How do I know when the tenders are cooked through?
Fry the chicken until the coating is golden brown and the internal temperature reaches 75°C (165°F) to guarantee they are fully cooked.
- → Can this method be adapted for gluten-free options?
Yes, substitute the all-purpose flour with a gluten-free flour blend to accommodate dietary preferences without compromising texture.